How to Do Your First Pull-Up

Performing a pull-up is a great feat of strength.
It’s also a surprisingly good party trick. Someone points at a door frame pull-up bar and says, “Go on then.” You casually do one clean rep, everyone is impressed, and for a brief moment, you are basically an athlete.
That’s the dream anyway.
The reality is that pull-ups are much harder than they look. A lot of people assume they can do one, then end up just hanging from the bar looking helpless, wondering why gravity has suddenly developed a personal vendetta.
But the good news is this:
If you can’t do a pull-up yet, it doesn’t mean you’re weak. It usually means you need to build the right strength, practise the right technique, and progress in stages.
TL;DR: How to Get Your First Pull-Up
To get your first pull-up, you need to:
Build your back and bicep strength
Improve your grip strength
Learn the skill of the pull-up
Use rows and lat pulldowns
Progress in stages based on your starting point
Be consistent for several weeks
Don’t just jump at the bar every now and then and hope for character development.
If you just want 1 on 1 guidance instead of doing research that isn’t specific enough to you. I offer a first pull-up plan - check it out below.

Struggling to get your first pull-up? We will coach you with a personal training program is that is designed to take you from frustrated to confident with a proven step-by-step plan to get your first pull-up.
What you’ll get
One-on-one coaching tailored to your current ability
A clear, written progression plan with weekly targets
Form correction feedback
Workouts tailored to the equipment available to you
Guidance on mobility, recovery, and nutrition to support strength gains
Realistic timeline Most clients achieve their first strict pull-up within 8–12 weeks depending on baseline strength, consistency, and frequency of training. We set realistic expectations and deliver a repeatable path to success.
We’ll assess where you are, outline a personalised plan, and give you the first set of exercises you can start immediately. Your first pull-up is closer than you think—let’s make it happen.
Money back guarantee if you don’t get your first pull-up in 12 weeks.
Why Can’t You Do a Pull-Up Yet?
There are usually two main reasons someone can’t do a pull-up.
The first is strength compared to your bodyweight.
The second is skill.
Annoyingly, you need both.
1. You’re Not Strong Enough Yet
The pull-up mainly uses your back, especially your lats, along with your biceps, grip.
Most beginners think of pull-ups as an arm exercise, but your back should be doing most of the work. If your lats and upper back aren’t strong enough yet, you’ll struggle to pull yourself up no matter how aggressively you stare at the bar.
Very inconsiderate of the pull-up to require strength, but here we are.
2. You Haven’t Learned the Skill Yet
A pull-up is not just brute strength. It’s also a skill.
You need to learn how to:
Start the movement properly
Use your shoulders to initiate the movement
Pull with your back, not just your arms
Control your body
Lower yourself properly
This is why someone might be fairly strong on machines but still struggle with pull-ups. They have strength, but they haven’t quite learned how to apply it to that movement yet.
The good news is both problems are fixable.
You can build strength.
You can learn the skill.
You just need a better plan than “try one pull-up and get humbled once a week.”
Pull-Up Technique: How to Do One Properly
Before we get into the exercises and progression plan, it helps to understand what a good pull-up should actually look like.
Because if your technique is all over the place, you’re making an already difficult exercise even harder.
Bold strategy. Usually not ideal.
1. Grip the Bar Properly
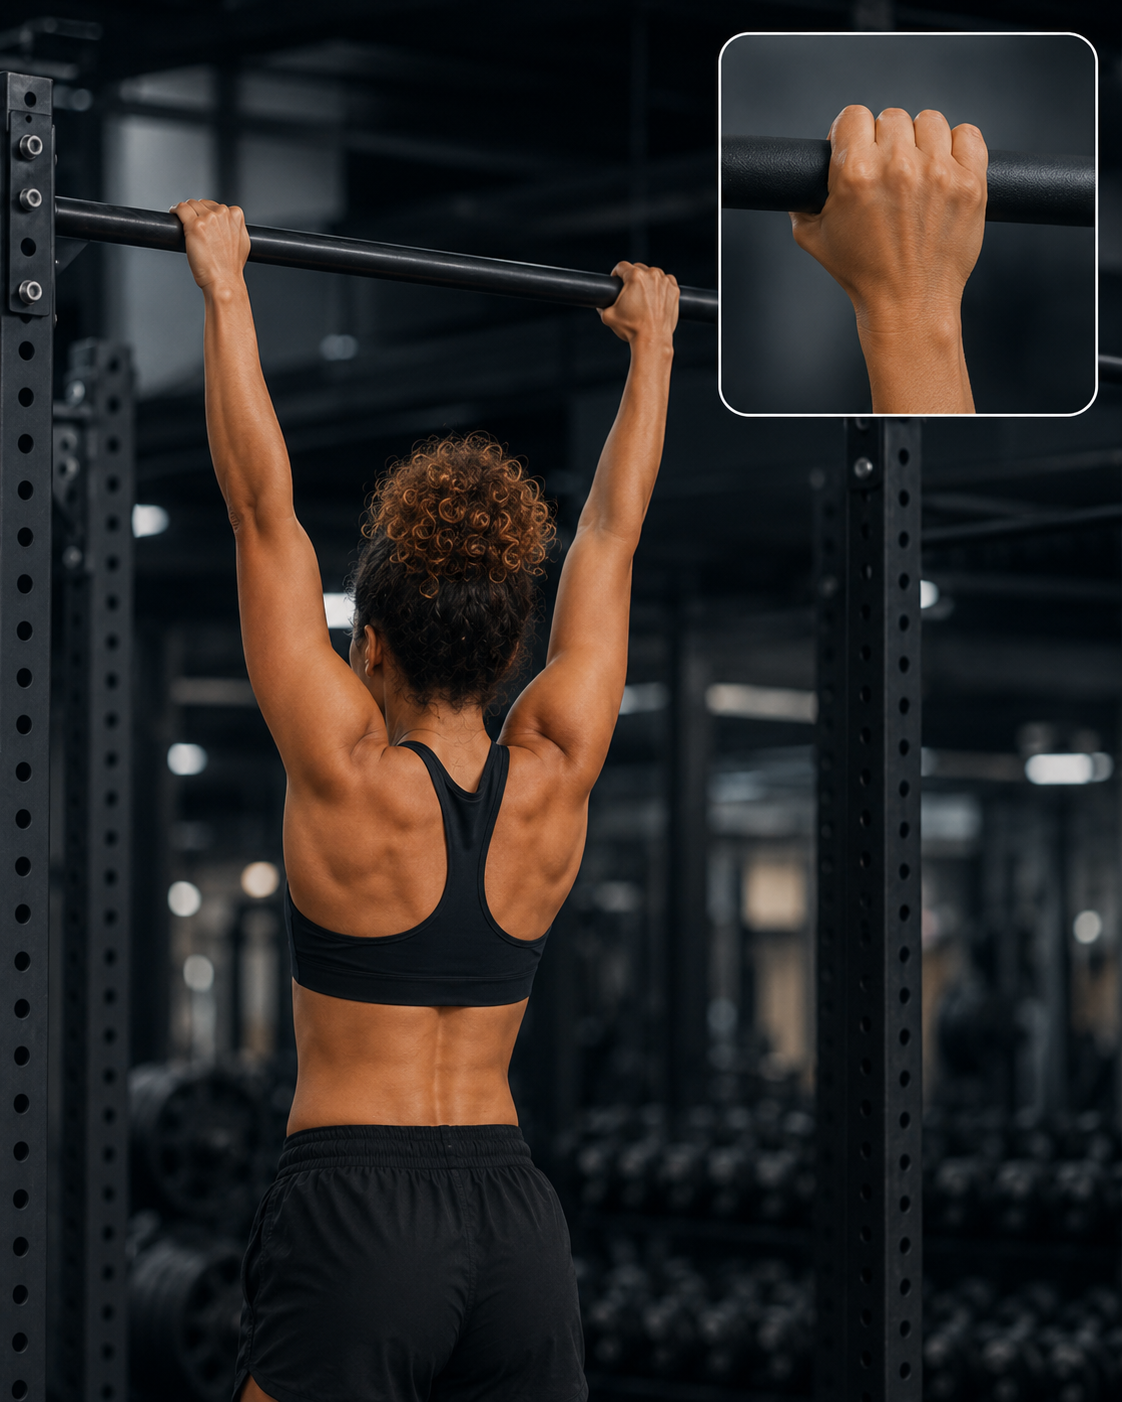
Use an overhand grip with your palms facing away from you.
Your hands should usually be around shoulder-width apart, or slightly wider. This may depend on the bar or pull-up station you’re using.
A few simple rules:
Shoulder-width is a good starting point
Slightly wider may feel better for some people
Very wide grips are usually harder
Choose a grip that feels comfortable on your shoulders and wrists
You don’t need to go ridiculously wide. This is not an attempt to become a human coat hanger.
2. Start From a Controlled Hang

Start by hanging from the bar with your arms straight.
Your body should be controlled, not swinging around like you’ve been caught in a strong breeze.
Keep your core braced and your legs still.
3. Engage Your Shoulders First
This is the bit a lot of beginners miss.
Before you bend your elbows and pull, you want to engage your shoulders and upper back.
Think about pulling your shoulder blades down and back. Almost like you’re trying to move the back of your shoulders down towards your hips.
That first little downward motion helps switch on your back and puts you in a stronger pulling position.
In simple terms:
Start the pull-up with your back, not just your arms.
4. Pull Yourself Up
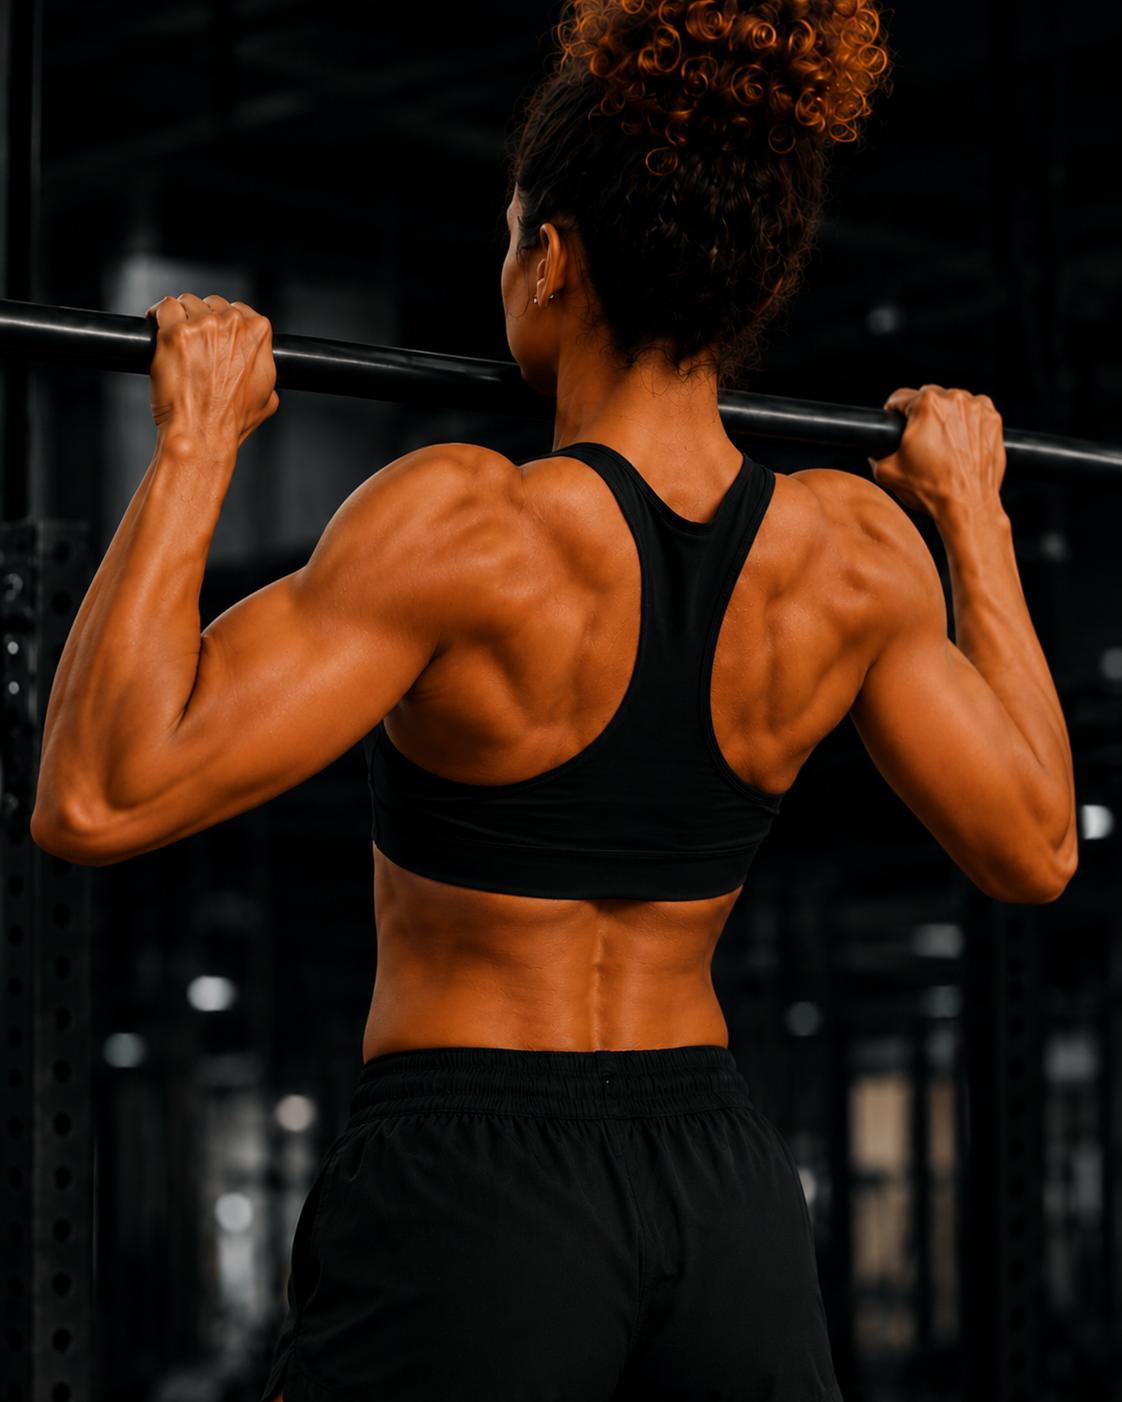
Once your shoulders are engaged, pull yourself up towards the bar.
Think about driving your elbows down towards your ribs rather than just thinking “chin over bar.”
Your chin should come over the bar at the top, but don’t turn it into a desperate neck extension competition.
Pull using:
Your lats
Your upper back
Your biceps
Your grip
The main cue:
Think “elbows down”, not “chin up”.
5. Lower Yourself Slowly
Once your chin is over the bar, lower yourself back down under control.
Don’t just drop.
The lowering phase builds strength too, especially when you’re working towards your first pull-up.
Control on the way down is one of the biggest keys to improving.
Exercises That Build Pull-Up Strength
To get your first pull-up, you need exercises that build the muscles and movement patterns involved.
These are the best ones to focus on.
1. Lat Pulldowns
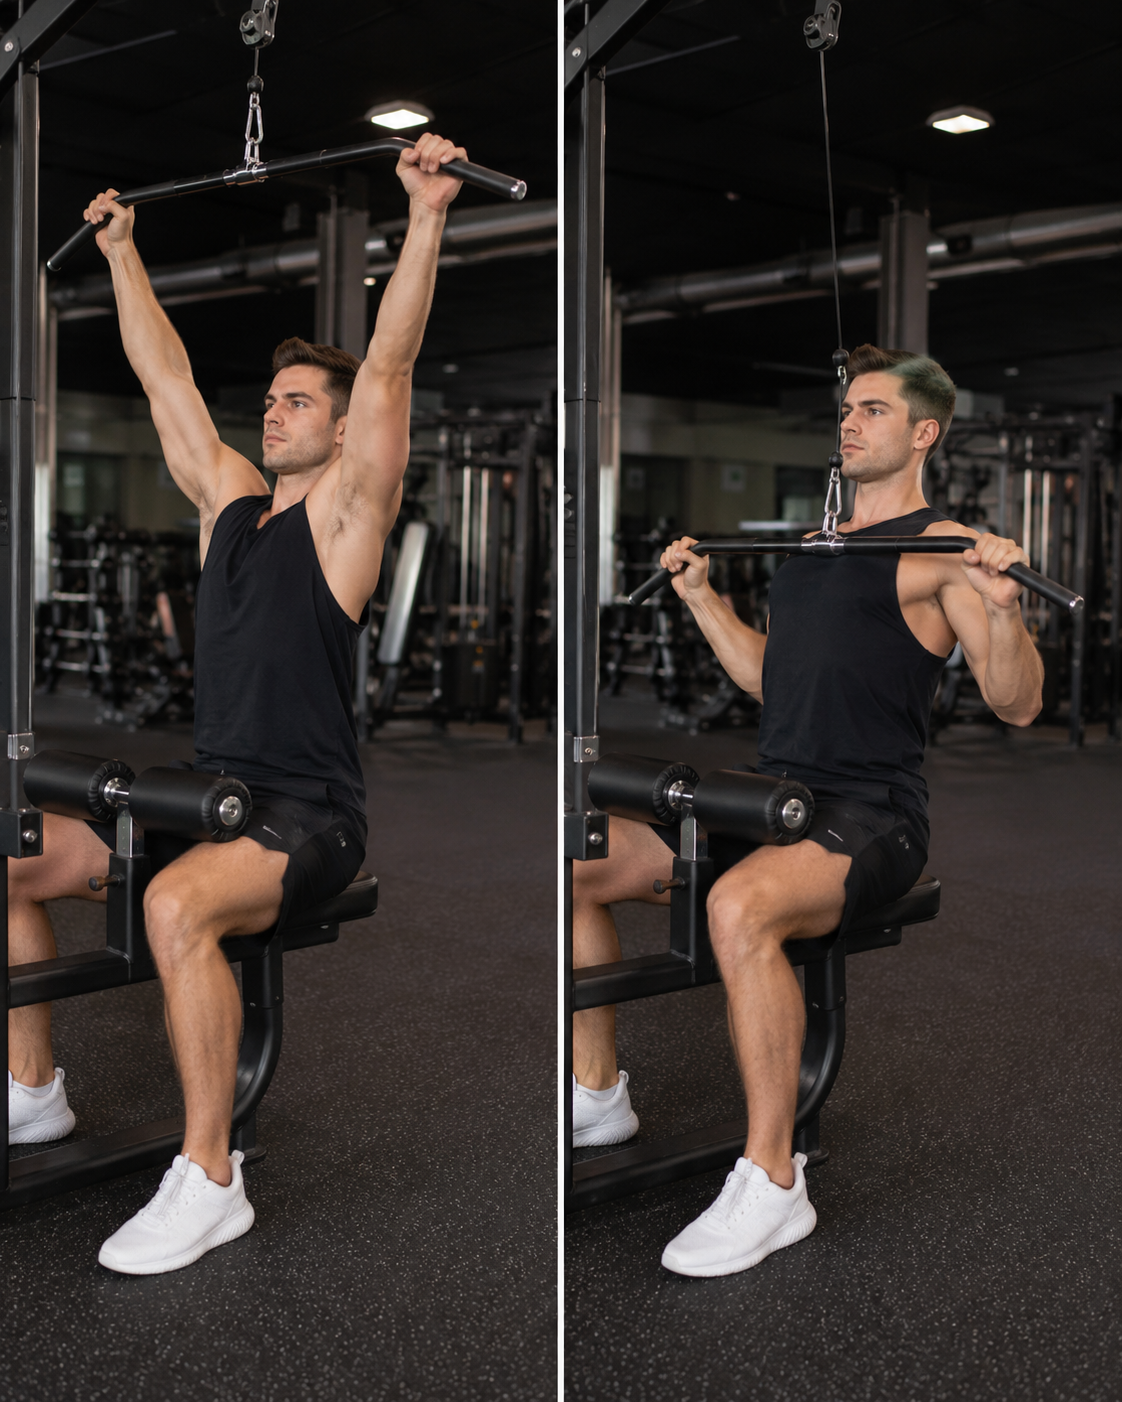
Lat pulldowns are one of the best starting exercises for building pull-up strength.
They train a similar pulling movement and help strengthen your lats, upper back, and biceps.
Focus on:
Pulling your elbows down
Keeping your chest up
Controlling the weight
Not leaning back so far it becomes a seated limbo competition
Lat pulldowns are especially useful if you’re not close to a full pull-up yet.
2. Assisted Pull-Ups
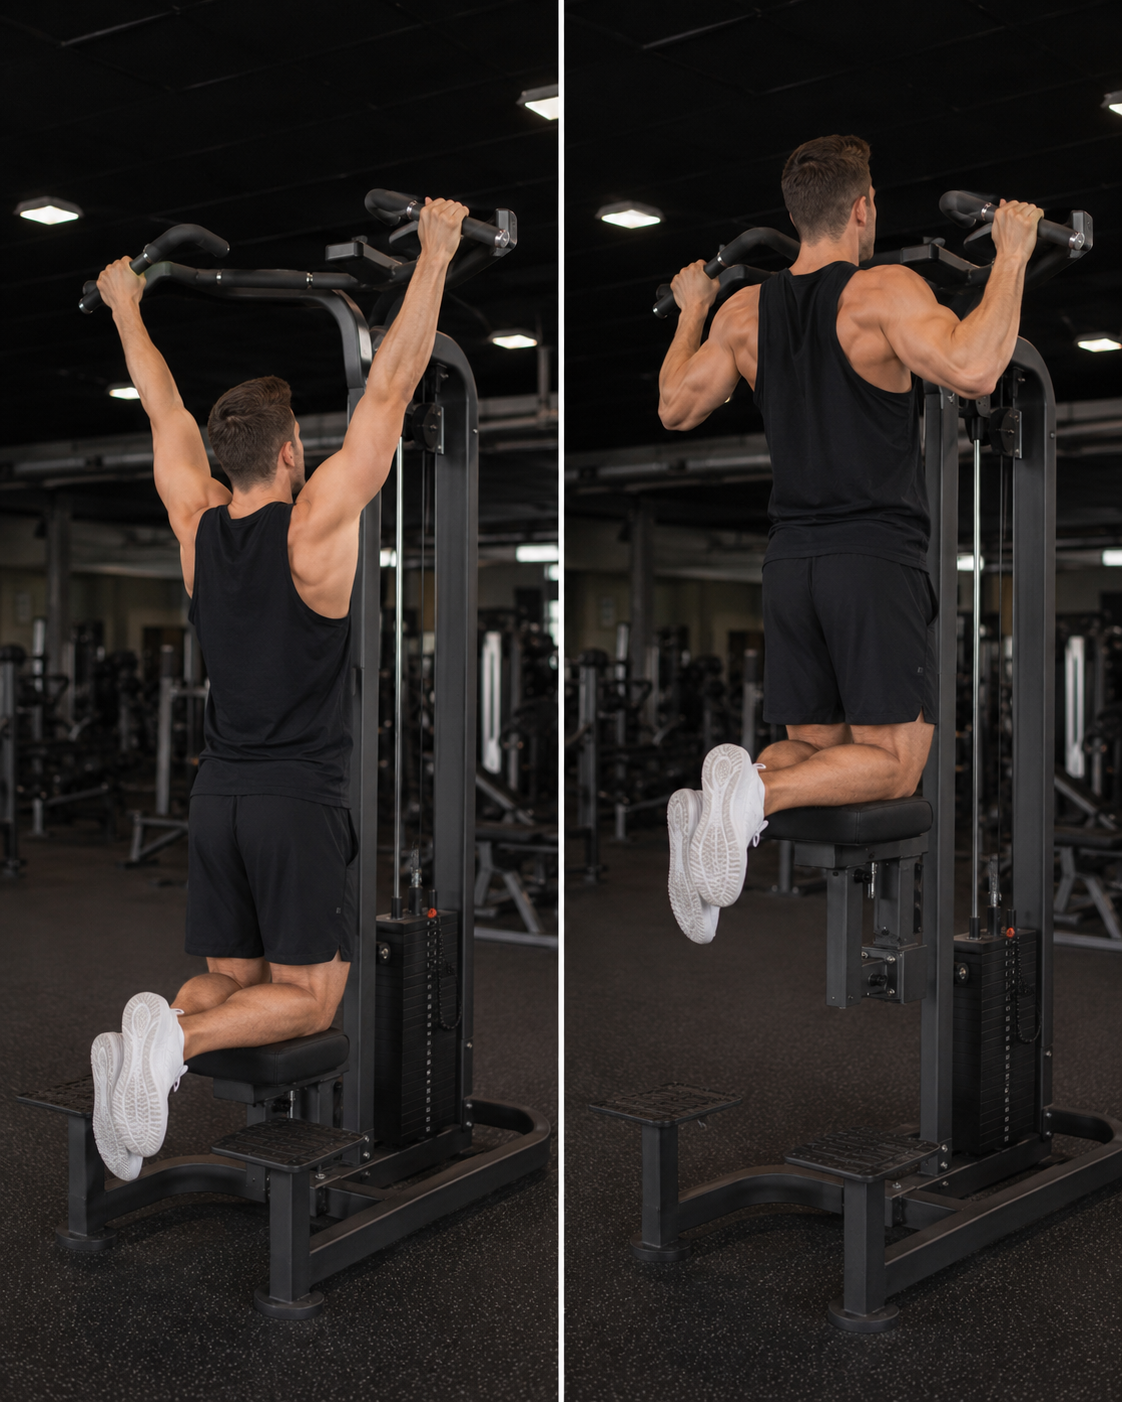
If your gym has an assisted pull-up machine, this is one of the best tools you can use.
It lets you practise the actual pull-up movement while reducing how much of your bodyweight you have to lift.
For example, if you use 30kg of assistance, you’re effectively lifting your bodyweight minus 30kg.
This is great because you can gradually reduce the assistance as you get stronger.
That gives you a clear progression instead of just hoping one day your body decides to cooperate.
3. Inverted Rows
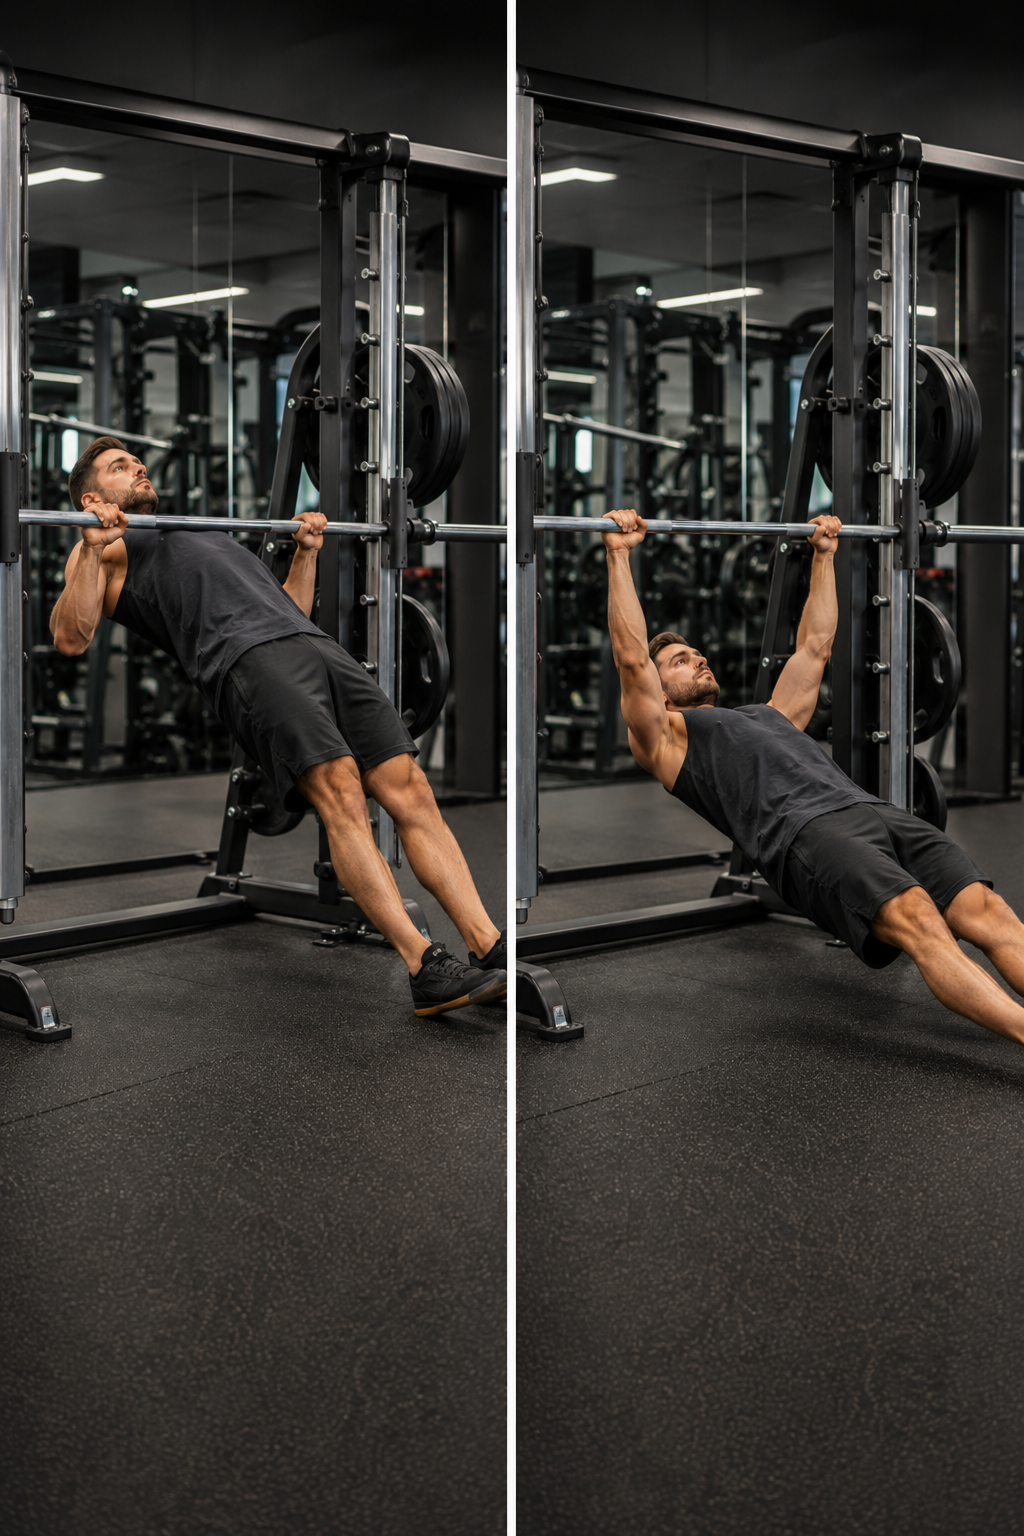
Inverted rows are brilliant for building pulling strength.
You can do these using a Smith machine, barbell in a rack, suspension trainer, or fixed bar.
The beauty of inverted rows is that they are easy to progress.
You can make them easier or harder by changing your body angle.
Easier version:
Bar higher
Body more upright
Feet closer to you
Harder version:
Bar lower
Body more horizontal
Legs straight
Feet elevated
So you might start almost standing, then gradually work towards a more horizontal row.
This is a great bridge between machine work and full pull-ups.
4. Rowing Machines
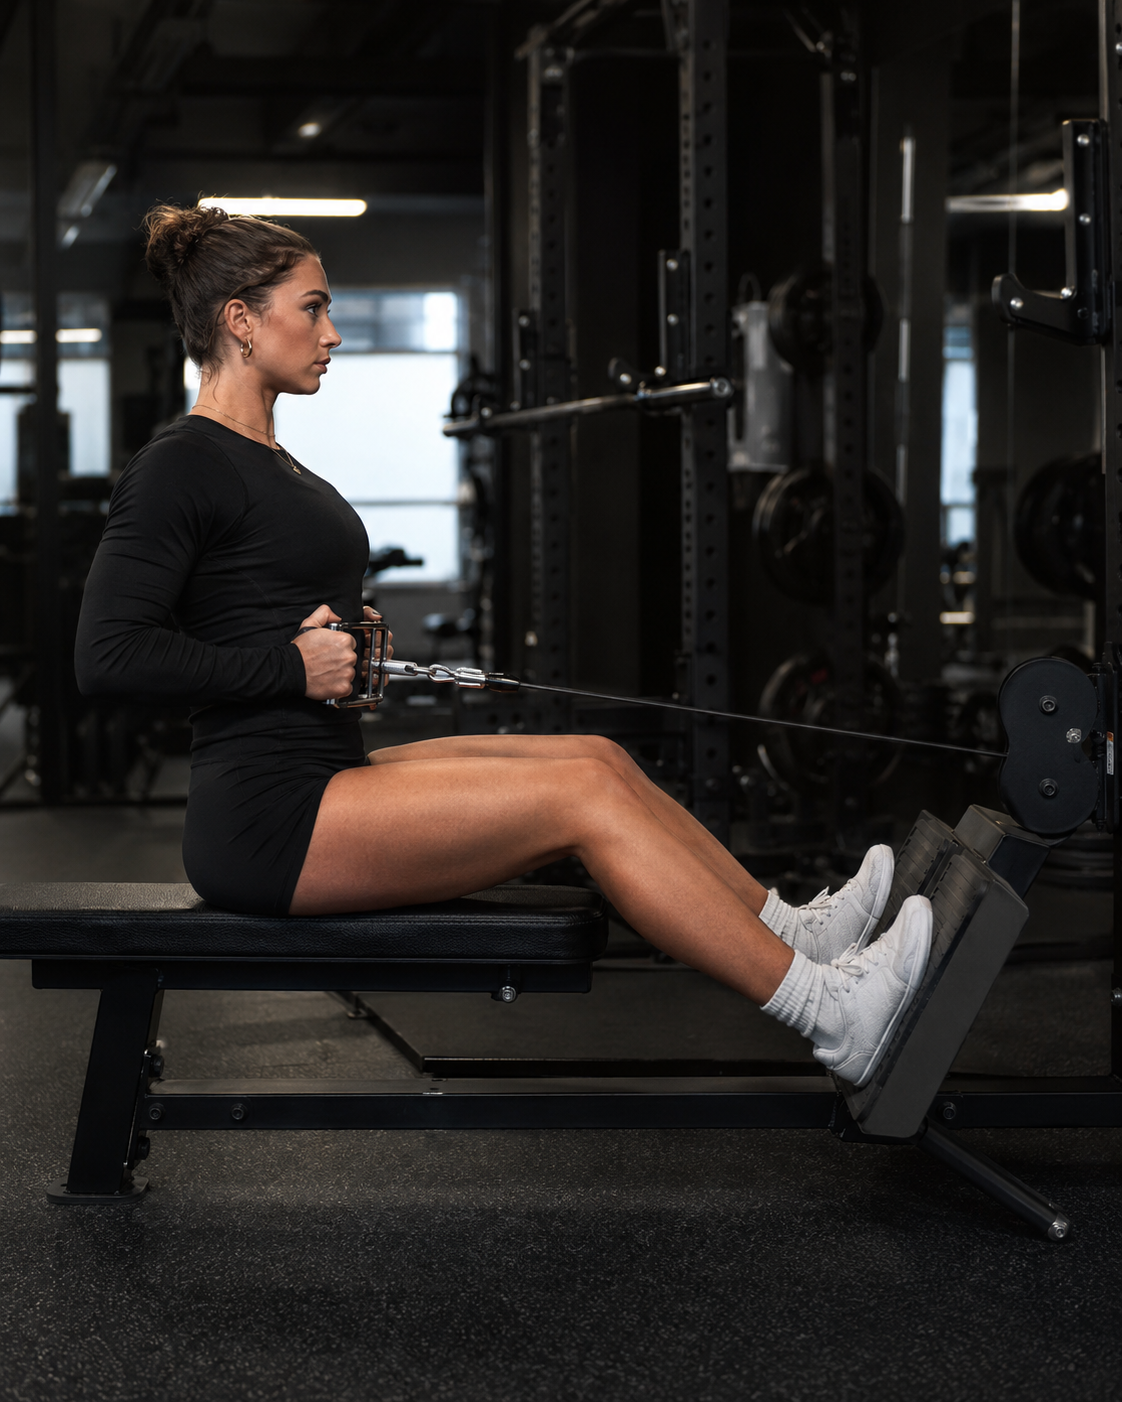
Any good rowing machine can help build your upper back, lats, traps, and biceps.
Good options include:
Seated cable row
Chest-supported row
Plate-loaded row
Single-arm machine row
Rows help build the general pulling strength that supports your pull-up.
They also help balance out all the pressing most people do.
Because apparently we all decided chest is fun and back is admin.
5. Dead Hangs
Dead hangs are simple, but very useful.
You just simply hang from the bar for as long as you can with good control.
They build:
Grip strength
Forearm strength
Shoulder comfort
Confidence on the bar
If you can barely hang from the bar, a pull-up is going to be a very ambitious request.
Start with what you can do.
If that’s 5–10 seconds, fine. That’s your starting point.
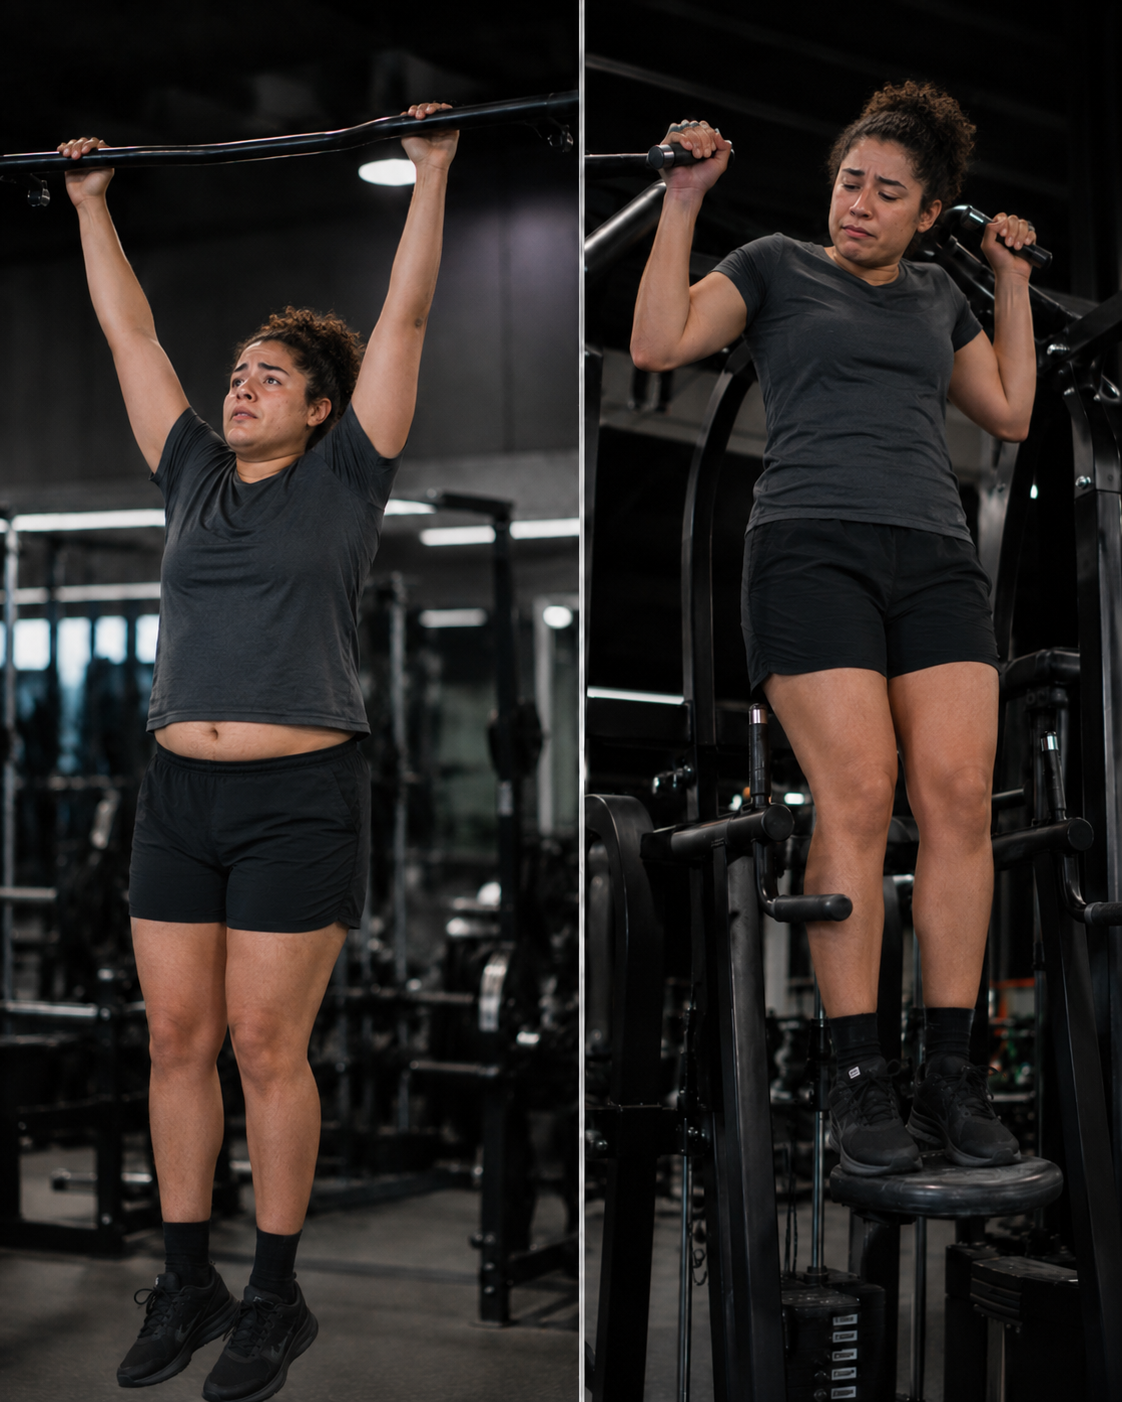
6. Negative Pull-Ups

Negative pull-ups are one of the best exercises for getting your first full rep.
Instead of pulling yourself up, you start at the top position using a box, bench, or small jump.
Then you lower yourself as slowly as possible.
The goal is to control the lowering phase for around 3–8 seconds.
These are hard, so don’t go mad with them.
A few controlled reps are enough. You don’t need to destroy your arms to prove a point. Your arms already know.
Find Your Starting Point First
Before following a plan, you need to know where you are starting from.
This is important because someone who can almost do one pull-up needs a different plan from someone who can barely hang from the bar.
So first, test your starting point.
Option 1: Use the Assisted Pull-Up Machine
If your gym has an assisted pull-up machine, start here.
Choose a high level of assistance and perform a few controlled reps.
Then gradually reduce the assistance until you find the point where the pull-up becomes difficult.
For example:
If you need 30kg of assistance and can only just complete a good rep, that’s your current starting point.
That gives you something to track.
Next time, your goal might be:
More reps at 30kg assistance
Better control at 30kg assistance
Or the same reps with 25kg assistance
That’s progress.
Option 2: Test Your Dead Hang
If you’re very new to pull-ups, test how long you can dead hang.
Rough guide:
0–10 seconds: build grip and hanging confidence first
10–30 seconds: start adding rows, pulldowns, and assisted pull-ups
30+ seconds: you’re ready to focus more on pull-up-specific strength
This isn’t a perfect test, but it’s a useful starting point.
Pull-Up Progression Plan
Instead of giving one generic workout, it’s better to progress in stages.
Because “just do this workout” is not helpful if someone can’t even hang from the bar yet.
That’s like giving someone a marathon plan when they’ve just discovered shoes.
Stage 1: Build the Base
This stage is for you if:
You can’t hang from the bar for long
Your grip gives out quickly
You’ve never seriously trained pull-ups before
You feel miles away from your first rep
Goal of this stage
Build grip strength, confidence on the bar, and basic pulling strength.
Do this 1-2 times per week
Dead hangs: 3 sets for as long as possible
Lat pulldown/assisted pull-ups: 3 sets of 8–12 reps
Inverted row, easy angle: 3 sets of 8–12 reps
Seated row or machine row: 3 sets of 8–12 reps
From here, you want to build your pull-up strength by slowly being able to dead hang and lift more weight over time.
Give yourself 4-6 weeks of solid progression before you move onto stage 2.
Stage 2: Practise the Pull-Up Movement
This stage is for you if:
You’re getting close to your first pull-up
You can use less assistance
You can control the lowering phase
You just can’t quite get the full rep yet
Goal of this stage
Practise the specific pull-up movement and build strength in the hardest parts of the rep.
Do this 1-2 times per week
Assisted pull-ups: 3 x 4–6 reps
Negative pull-ups: 3 x 3 reps
Inverted rows: 3 x 8–10 reps
Lat pulldown: 2 x 8–12 reps
Dead hangs: 2 sets
Progress when
You can lower yourself slowly for 5–8 seconds and only need a small amount of assistance.
Stage 4: Get Your First Pull-Up
This stage is for you if you’re very close.
At the start of your session, when you’re fresh, try one pull-up.
Not 12 attempts. Just one.
If you get it, great.
If you don’t, continue with your assisted pull-ups, negatives, rows, and pulldowns.
Remember to warm up for your attempt by doing 3-4 reps on the assisted pull-up or lat pulldown and progressively make it more challenging until you feel ready for your attempt.
The key is:
Test occasionally. Train consistently.
That’s how you get there.
Common Pull-Up Mistakes
Here are the main mistakes people make when trying to get their first pull-up.
1. Only Trying Full Pull-Ups
If you can’t do one yet, repeatedly failing one is not the best plan.
You need progressions.
2. Ignoring Grip Strength
If your grip gives up before your back does, that’s your limiting factor.
Dead hangs will help.
3. Swinging Too Much
A little movement is normal, but if you’re swinging everywhere, you’re making the exercise harder to control.
Keep your body tight.
4. Pulling Only With Your Arms
Your biceps help, but your back should be doing most of the work.
Think elbows down.
5. Using the Same Assistance Forever
If you always use the same assistance, you’re not progressing.
Reduce it slowly over time.
6. Not Training Rows or Pulldowns
Pull-ups are specific, but general pulling strength still matters.
Rows and pulldowns are your friends.
Not exciting friends, maybe. But useful ones.
How Long Does It Take to Get Your First Pull-Up?
It depends on your starting point.
Some people might get their first pull-up in a couple of weeks.
Others may need three or four months.
Both are normal.
If you already train, have decent back strength, and can use lat pulldowns well, you might just need to learn the technique and practise the movement.
If you can’t dead hang yet, or you’re heavier, it will likely take longer.
That doesn’t mean you can’t do it.
It just means your first stage is building the base.
What If You’re Heavier?
The heavier you are, the harder pull-ups usually are.
That’s just how it works.
You’re pulling up your own bodyweight, so your strength-to-bodyweight ratio matters.
But this does not mean you shouldn’t try pull-ups if you’re heavier or overweight.
You absolutely can.
You may just need more time, more assistance, and a safer setup.
Use:
Assisted pull-up machines
Resistance bands
Boxes
Rows
Lat pulldowns
If you’re in a phase where you’re losing weight, it’s actually a great time to start learning pull-ups.
Why?
Because you’re doing two helpful things at once:
Getting stronger at the movement
Making the movement easier as bodyweight comes down
That can make progress feel much faster and more rewarding.
Which is nice, because cutting usually removes joy from other areas of life.
Final Thoughts
Your first pull-up doesn’t come from randomly jumping at the bar every few weeks and hoping this is the day.
It comes from building the right strength, learning the movement, and progressing in stages.
Start where you are.
If you can barely hang, build your grip and basic pulling strength.
If you can hang but can’t pull, use assisted pull-ups, rows, and pulldowns.
If you’re nearly there, practise negatives and test occasionally.
A pull-up is difficult, but it’s not magic.
Train it properly, stay consistent, and eventually you’ll get your first one.
Then you can become that person at the party.